Changelog
Follow up on the latest improvements and updates.
RSS
Introducing a convenient new feature for event organizers: Clone Events! Effortlessly duplicate your past or current events to save time and streamline your planning process.
What's New:
Clone Events Feature
Easily duplicate any existing event with just a few clicks. The Clone Events feature allows you to create a new event based on the details of a previous one, making it perfect for
recurring events
or when you want to retain a similar format.Quick Setup
Speed up the event creation process by copying event details, including date, time, venue, description. Customize the cloned event as needed, ensuring you maintain consistency while making necessary updates.
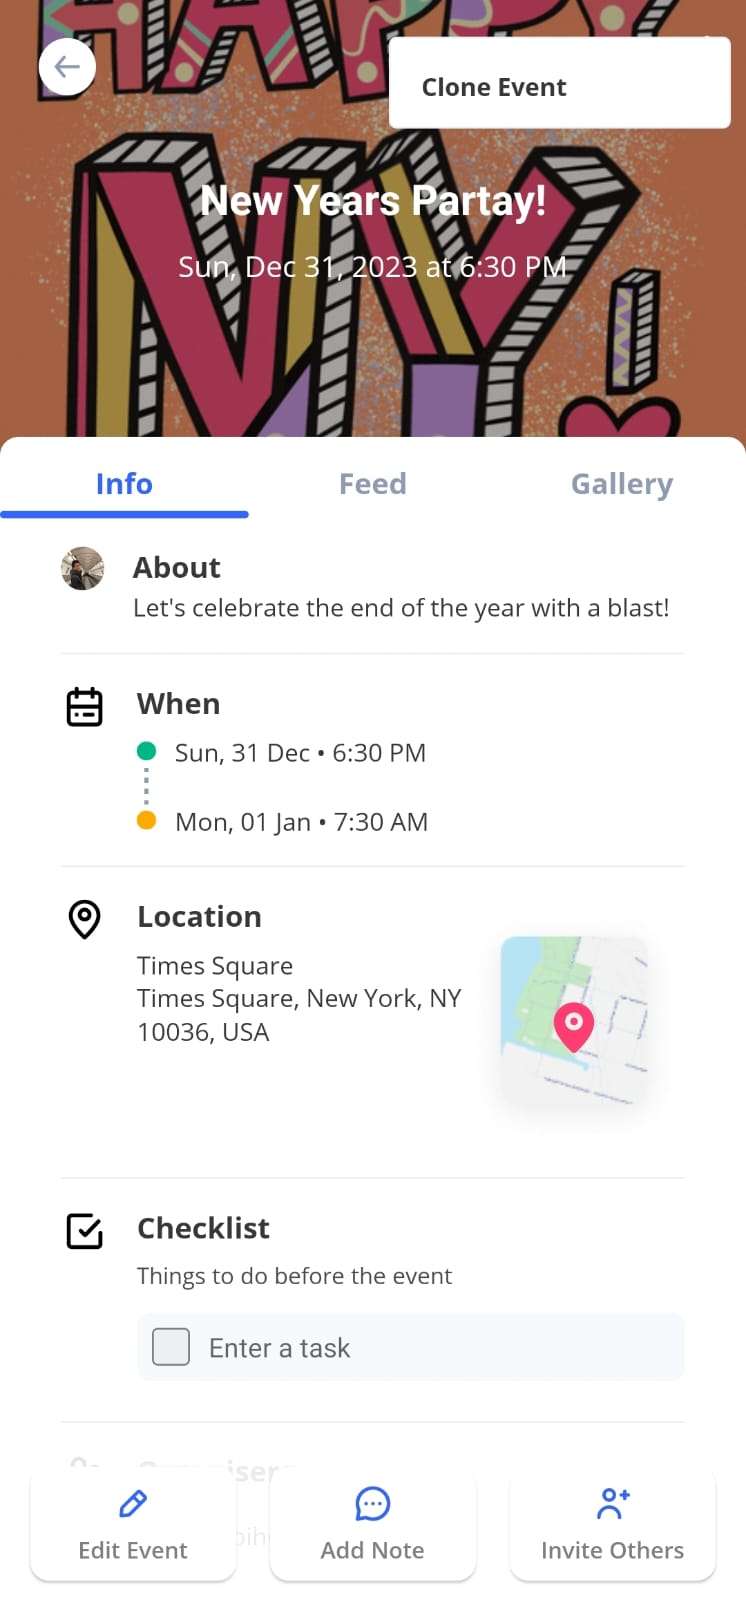
How to Use Clone Events:
- Navigate to your event list.
- Open the event you wish to clone.
- Click on the "Clone Event" option in the menu in the top right corner.
- Update the new event's details as needed.
- Save the cloned event and start promoting it!
We're excited to introduce a powerful new tool for managing your event attendees: New Guestlist Page! This feature offers enhanced functionality, allowing organizers to search for users and perform actions such as viewing forms and profiles.
What's New:
Enhanced Guestlist Management
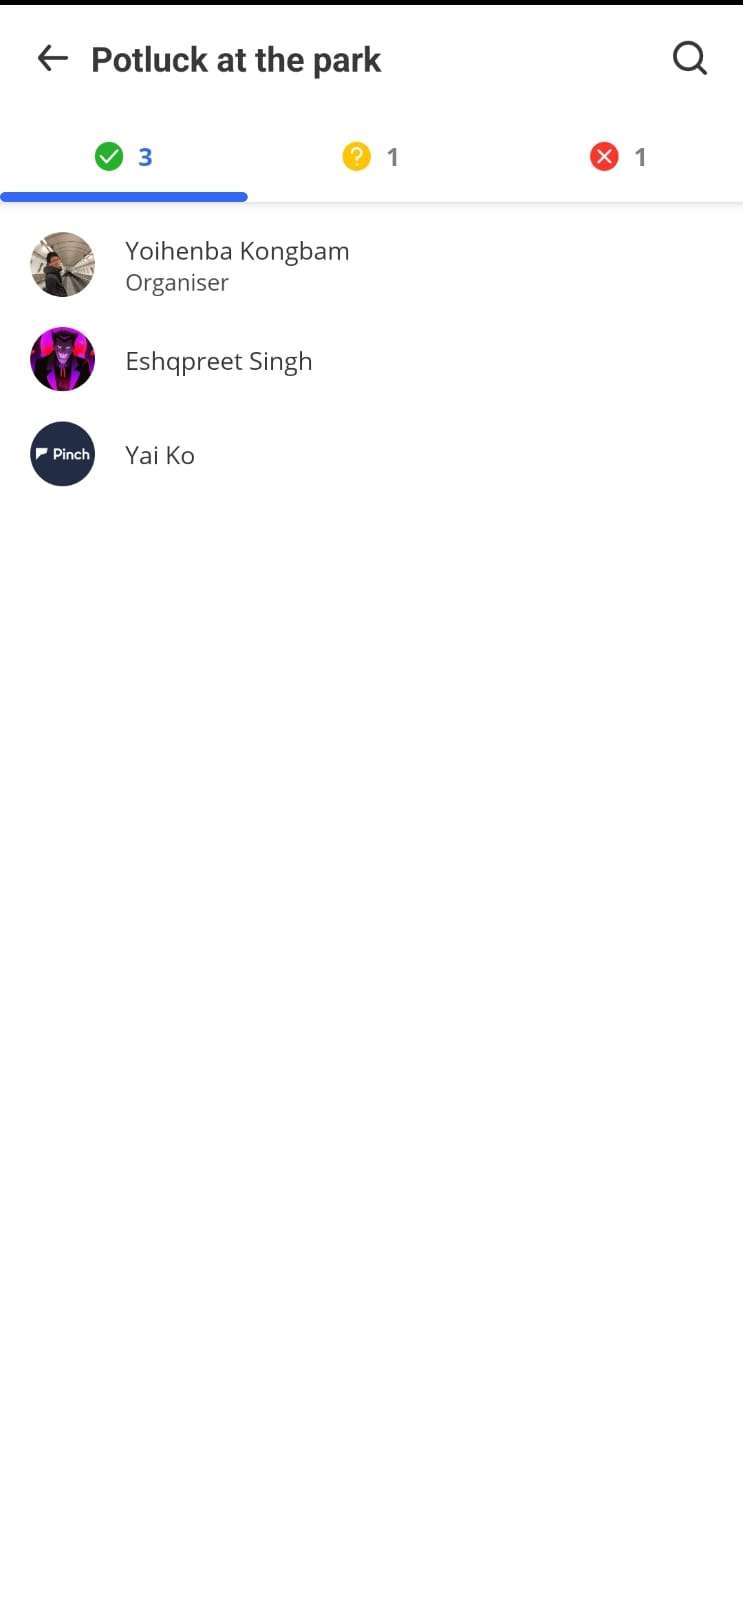
Our new Guestlist Page provides organizers with a comprehensive and easy-to-navigate list of all event attendees. Manage your guest list efficiently and stay organized.
Search for Users
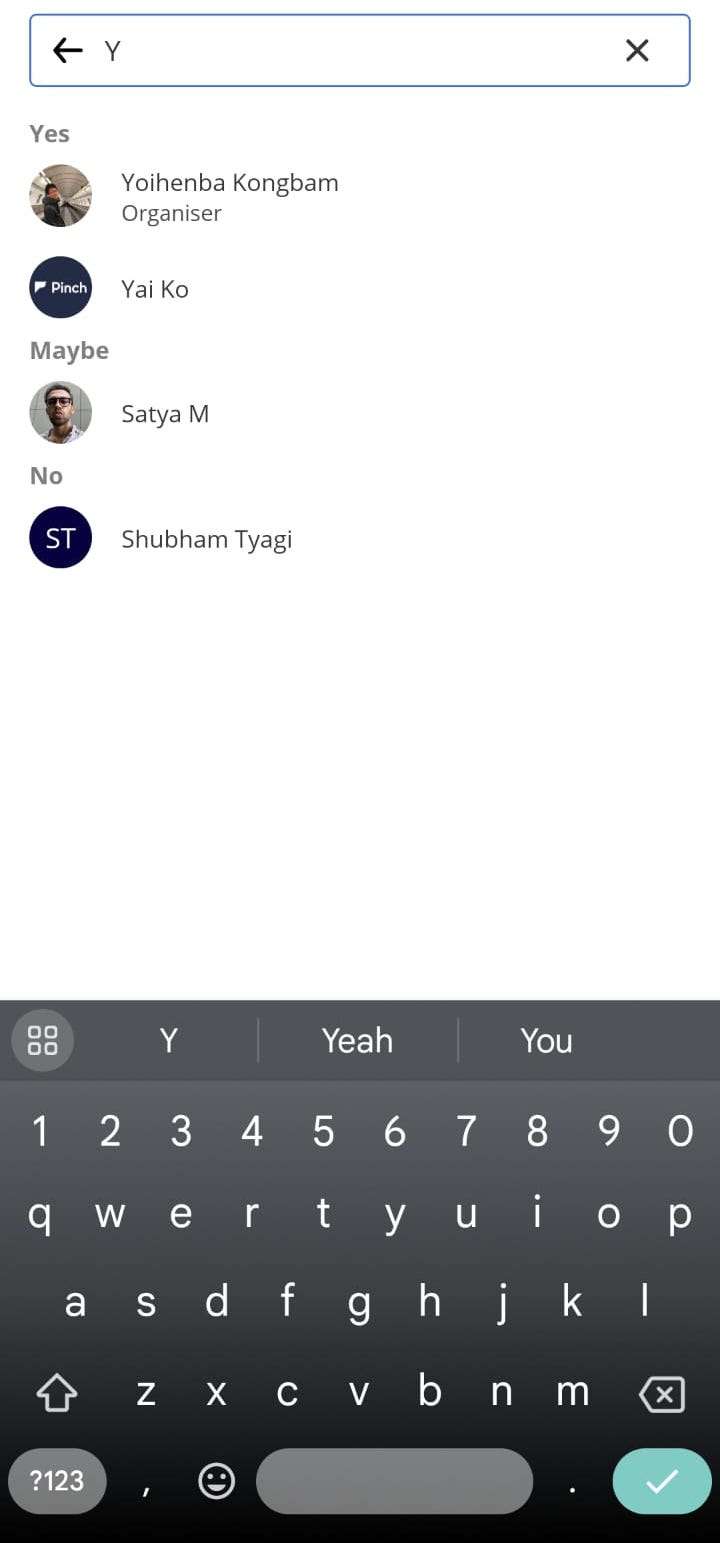
Quickly find specific attendees using the new search functionality. Simply type in a name or keyword to locate any user on your guest list instantly.
Organizer Actions on Attendees
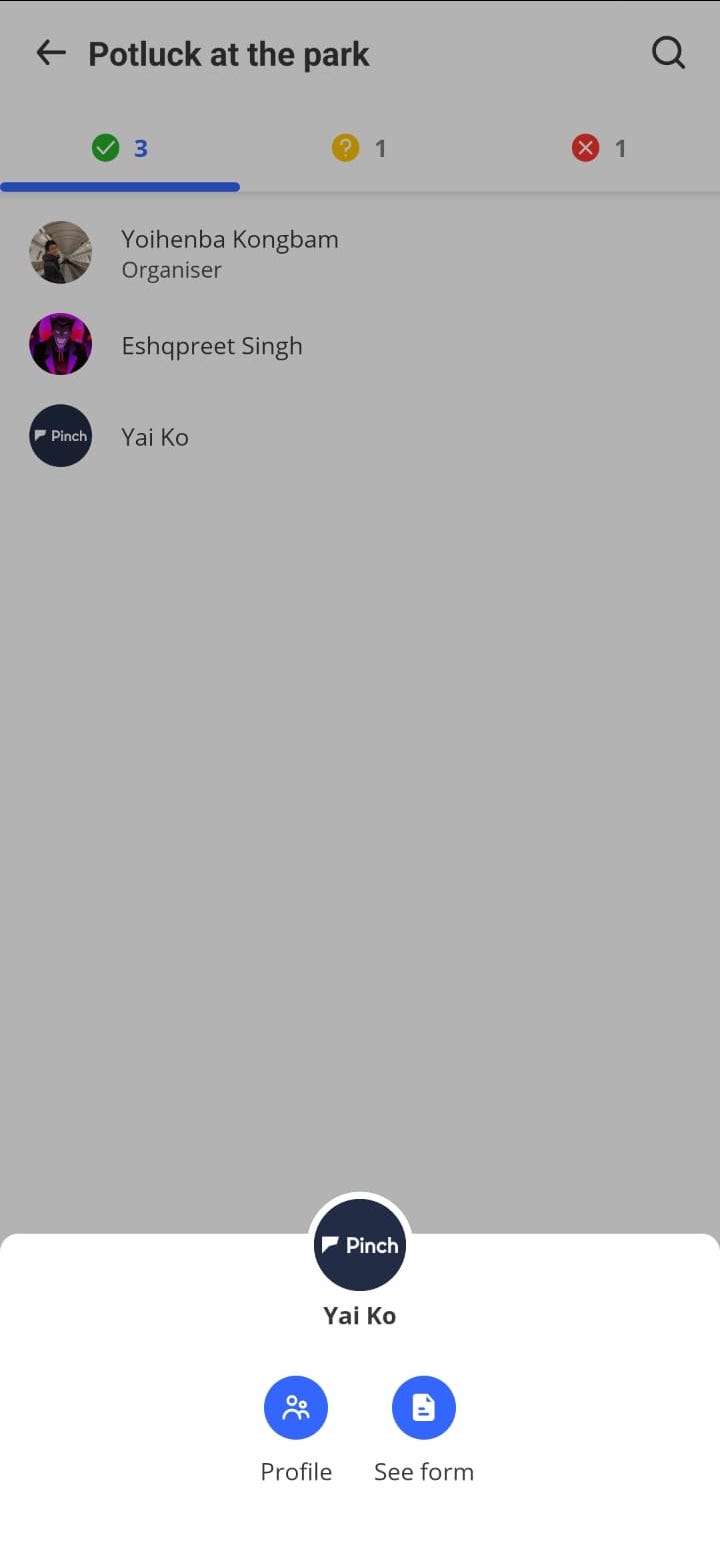
Organizers can now perform a variety of actions directly from the guest list. View submitted forms, access attendee profiles, check-in user and manage guest details seamlessly.
We’re excited to introduce a sleek and engaging way to view event photos: Photo Media Viewer! This new feature comes with a swipe interface and significant render optimizations to enhance your viewing experience.
What's New:
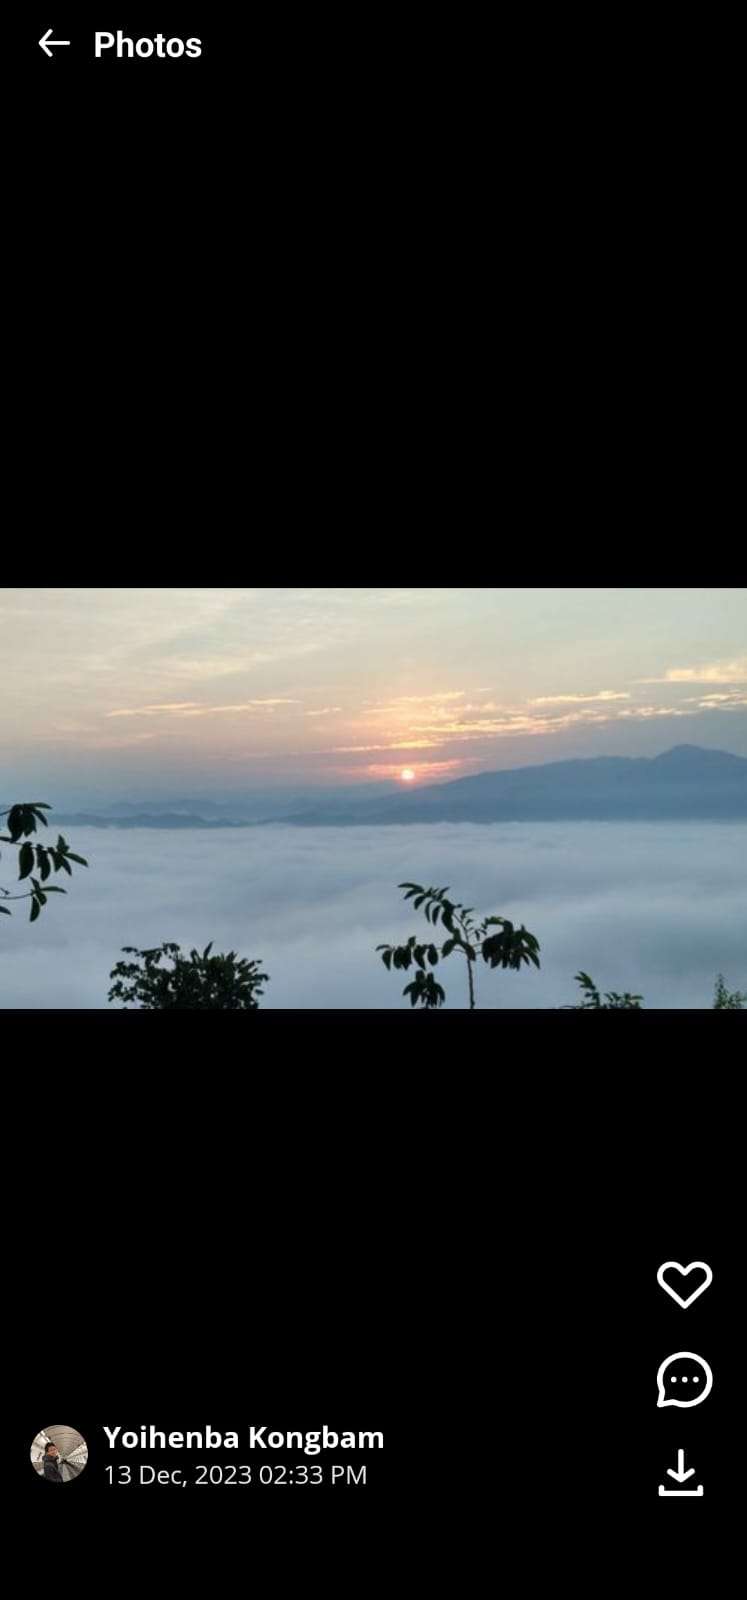
Swipe Interface for Photos
Enjoy a smooth and interactive way to browse through event photos. Our new swipe interface allows you to easily swipe up and down to view images, providing a dynamic and engaging experience.
Render Optimizations
We've made significant improvements under the hood to ensure that photos load quickly and smoothly. These render optimizations guarantee a seamless viewing experience, even with high-resolution images.
How to post Photos
- Open any event.
- Go to the gallery tab.
- Open any photo.
- Swipe down to go to the next
We’re thrilled to announce major updates to our web app, bringing powerful features that enhance your event planning and participation experience. Introducing: Explore Events, Sign in with Google, Event Creation with Forms and Themes on the web app!
What's New:
Explore Events on the Web
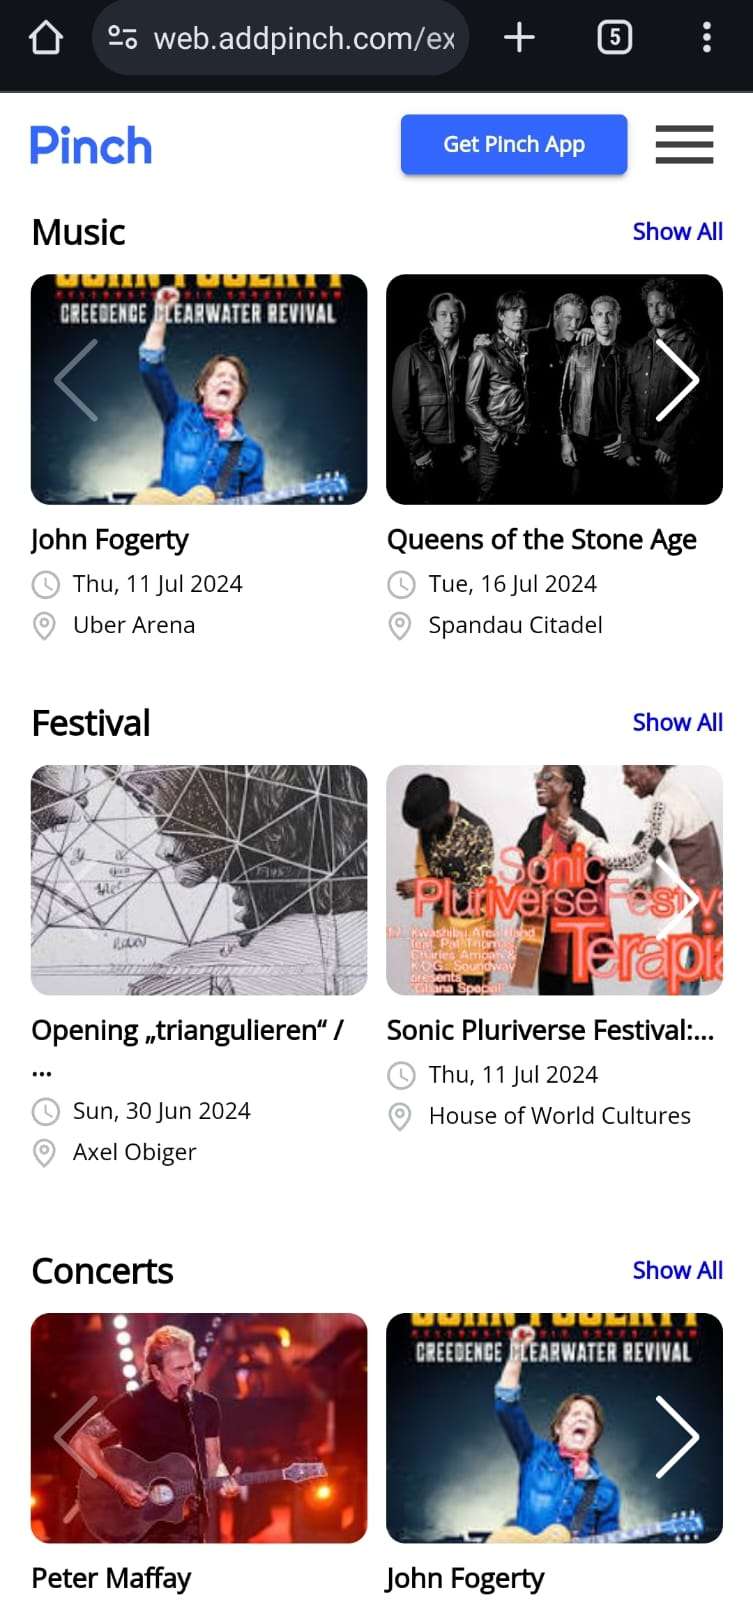
Discover and browse through a variety of events directly from your web browser. Our web app now mirrors the app experience, allowing you to explore events by category, popularity, or location with ease.
Sign In with Google

Simplify your login process with our new Sign In with Google feature. Securely access your account with a single click, without the need to remember additional passwords.
Event Creation with Forms and Themes
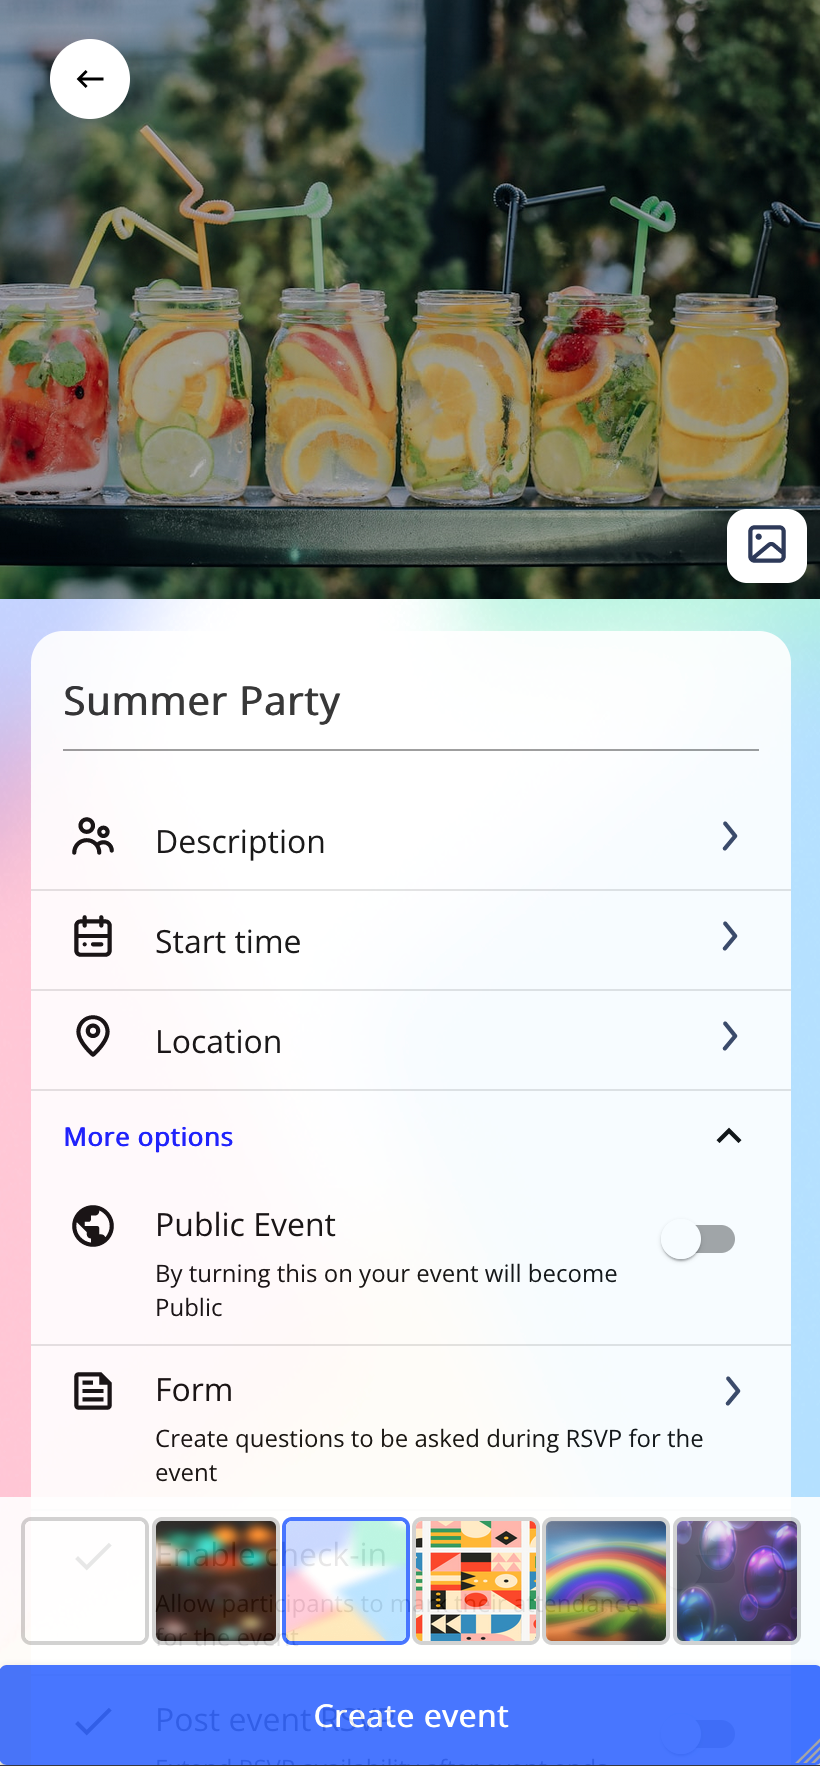
Plan and create your events seamlessly on the web. Utilize customizable forms to gather attendee information and feedback. Enhance your event invitations and descriptions with a range of themed templates to match the style and mood of your event.
We are excited to introduce a new and efficient way to manage event check-ins with our QR Code Check-In feature. This feature simplifies the entry process and ensures secure and accurate attendance tracking.
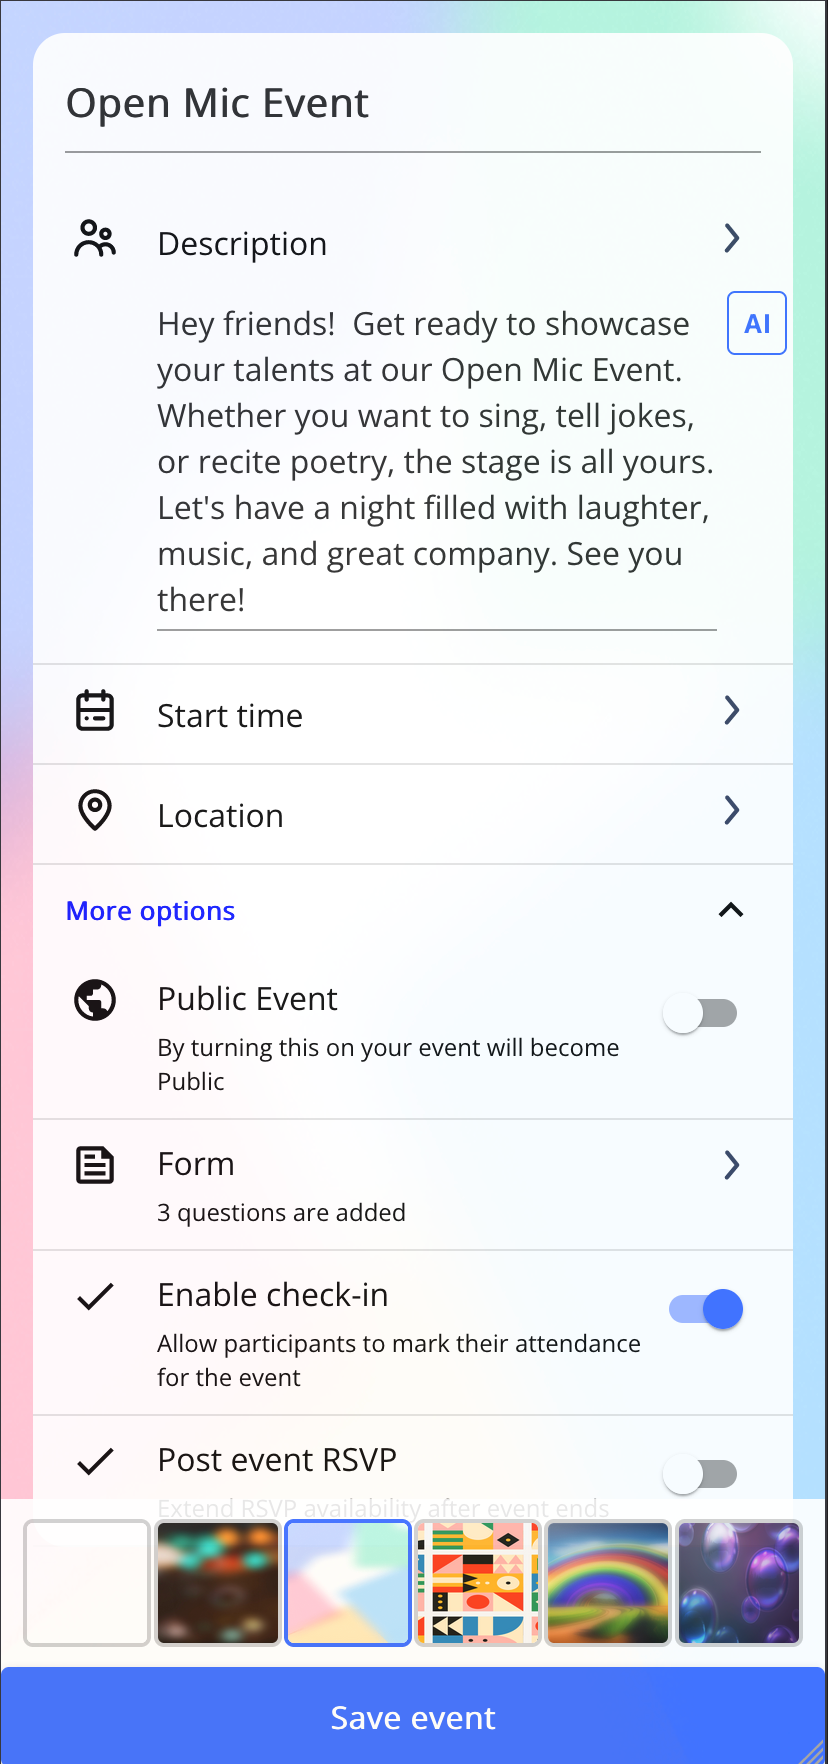
Key Functionalities:
- Organizer Enables Check-In: Event organizers can enable the QR Code Check-In feature from the event dashboard. This allows for a seamless and streamlined check-in process for all attendees.
- Organizer Displays QR Code: Organizers can generate and display a unique QR code for the event. This QR code can be shared via email, within the app, or displayed at the event entrance for attendees to scan.
- Attendee Scans QR Code to Check In: Attendees can scan the event's QR code upon arrival. This instantly checks them in, ensuring a quick and hassle-free entry process.
How to Enable QR Code Check-In:
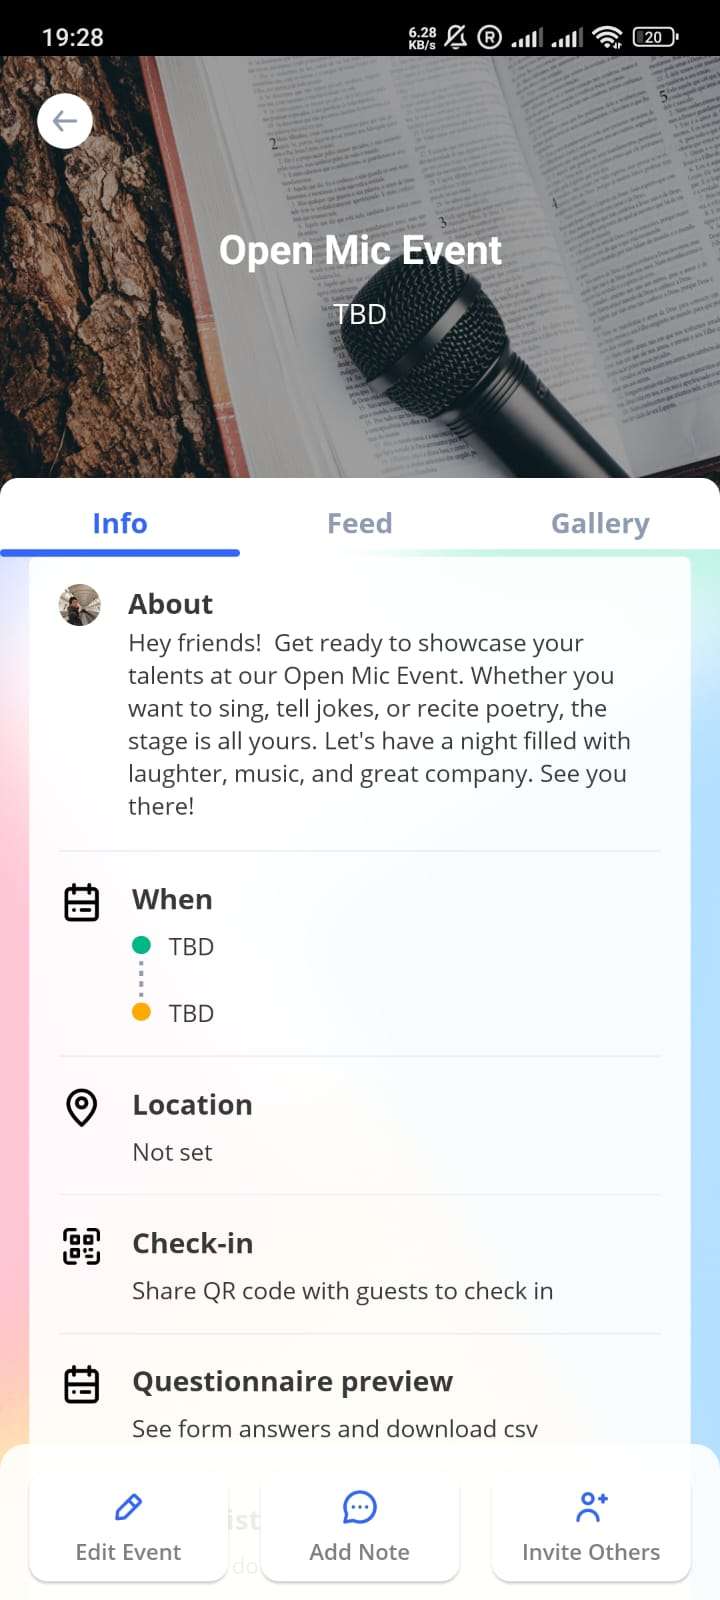
For Event Organizers:
- Open the app and navigate to your event. Open More Optionsand find the Enable Check-In setting.
- At the event. Open the QR code by going into the event and tap on the Check-in option.
- You can then check in users by letting the attendee scan the QR code or printing out the QR code.
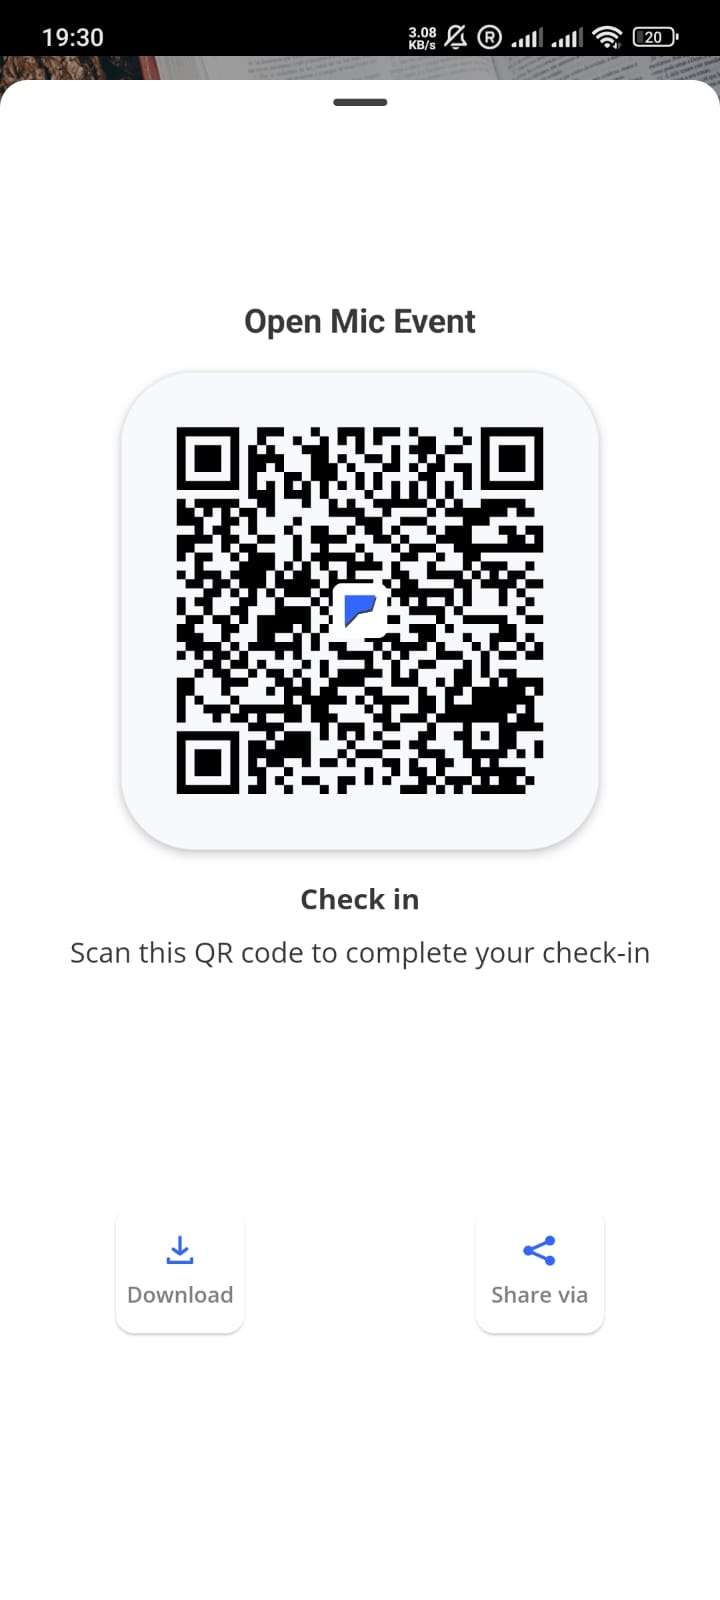
For Attendees:
- Scan the QR code and check in for the event.
We're excited to introduce a powerful new tool for streamlining event management and enhancing attendee engagement: Event Forms! This feature makes it easier than ever to collect information and feedback from your event participants.
What's New:
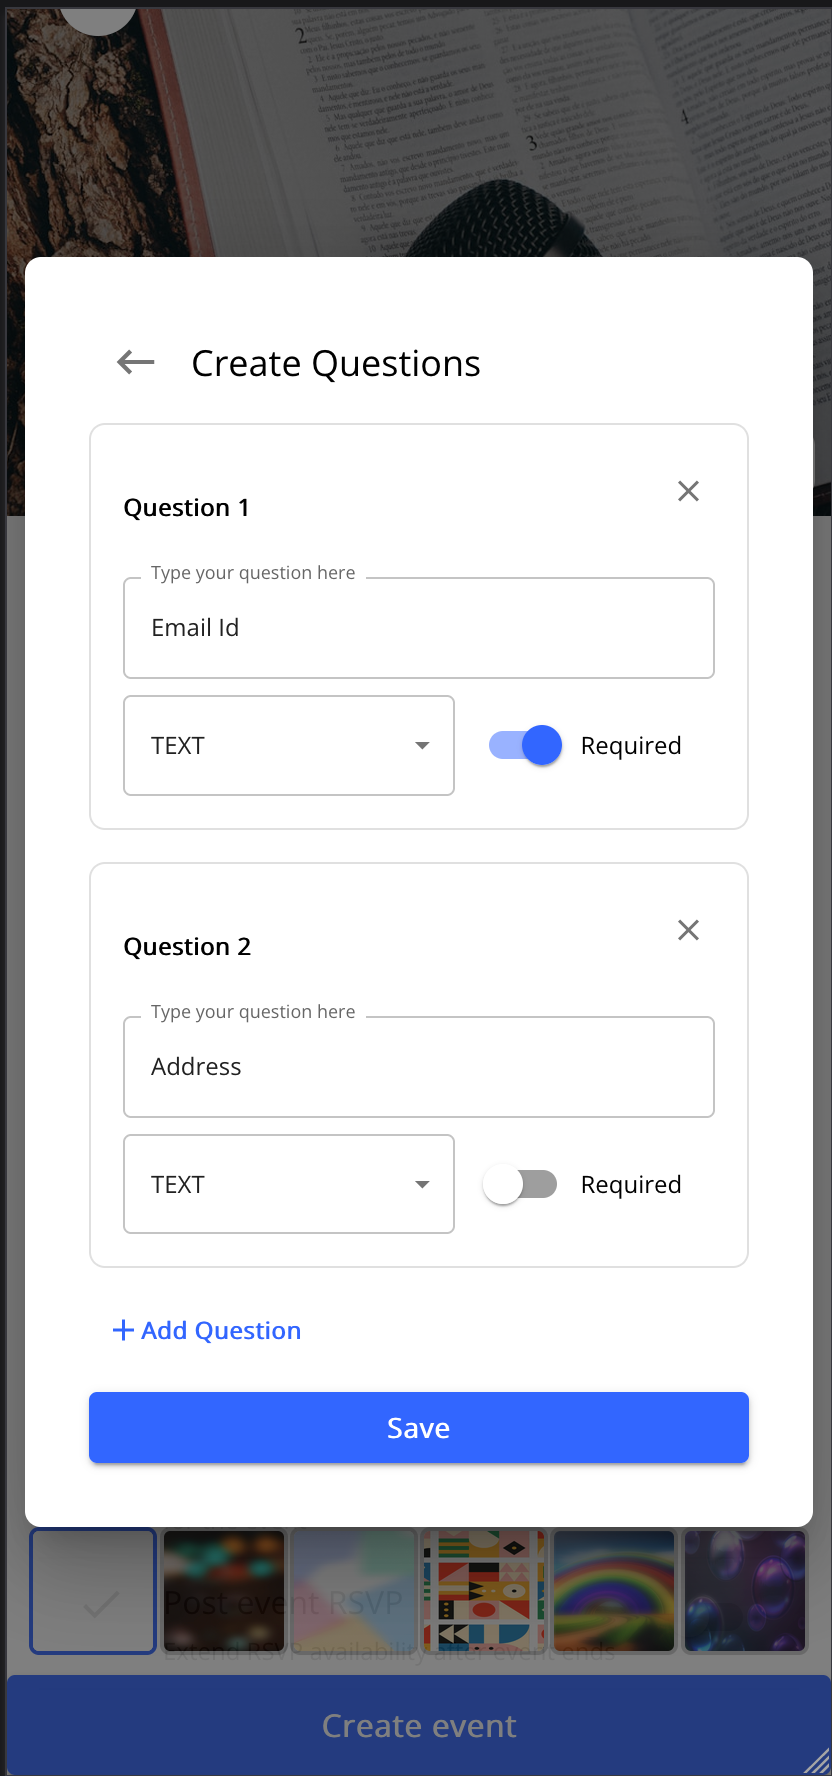
- Customizable Event Forms: Create tailored forms to collect any information you need from your attendees. Whether it's registration details, feedback, preferences, or special requests, our customizable forms have you covered.
- Easy Form Creation: Design forms effortlessly with our intuitive form builder. Add various types of questions, including multiple choice, short answer, checkboxes, and more, to gather the specific data you require.
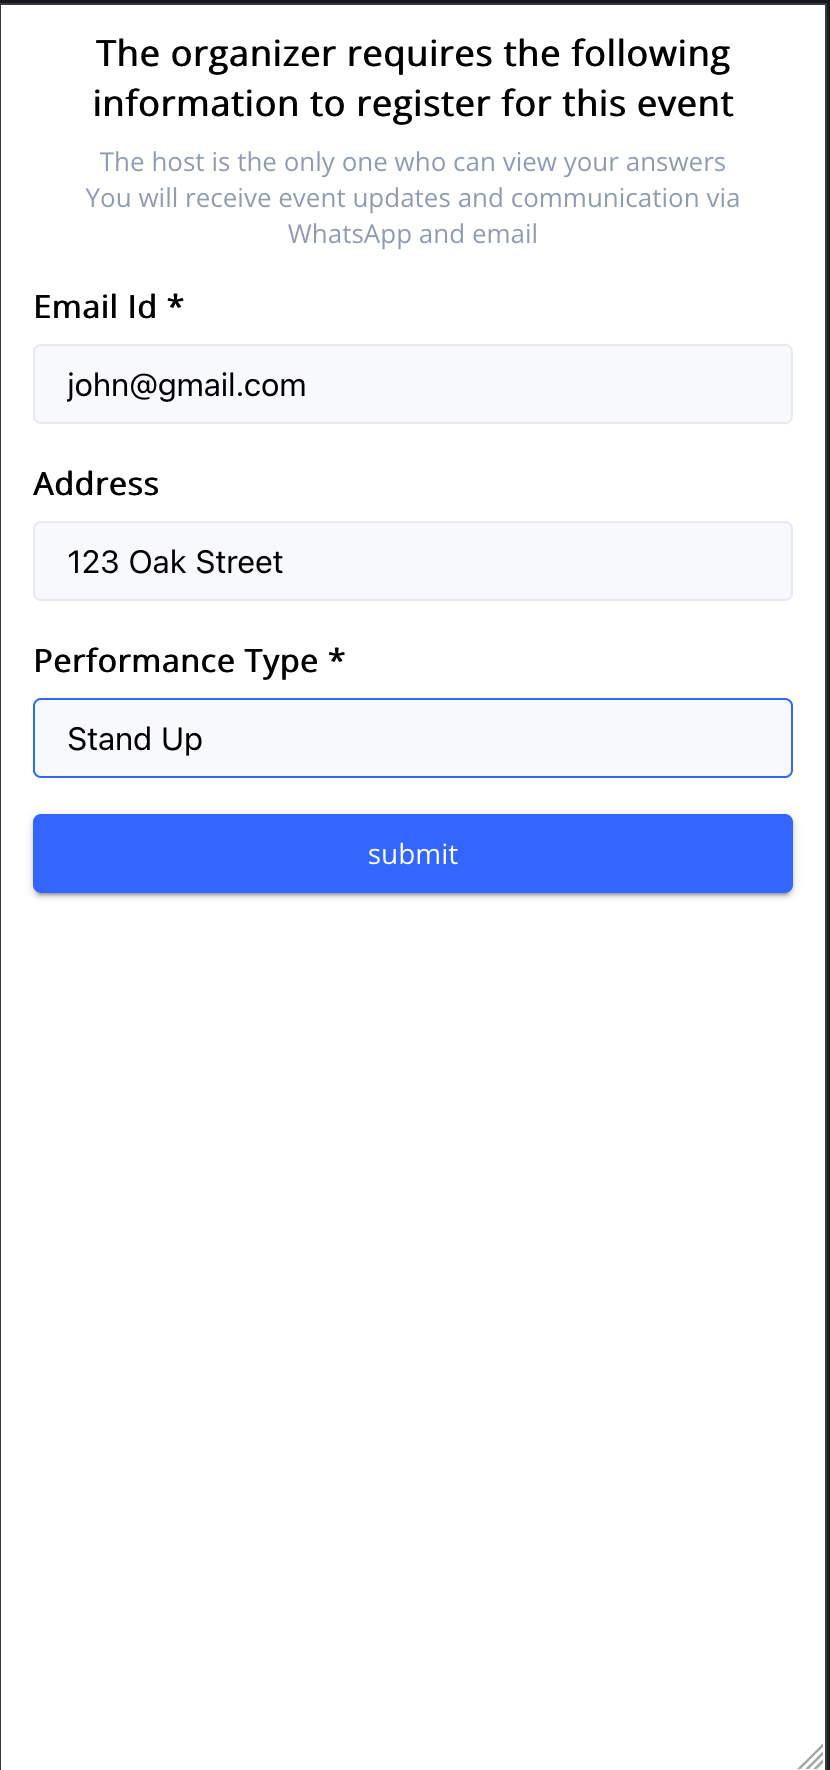
- Seamless Integration with Events
Integrate forms directly into your event pages. Invitees can fill out forms during registration or during check-in ensuring you capture all necessary information.
How to Create and Use Event Forms:
- Open the app, and navigate create event. Or Open Create event on Web.
- Look for the "Form" option.
- Use the form builder to add and customize questions.
- Save and integrate the form with your event.
Themed Invitation card
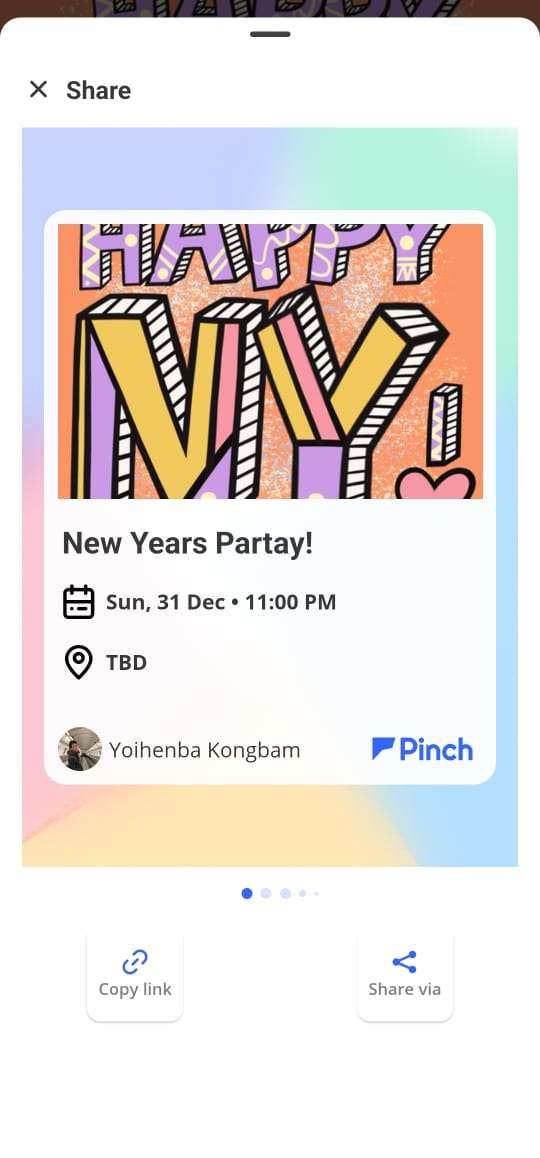
Elevate your event promotion game and make a lasting impression on your guests.
Choose from a range of professionally designed invitation card themes that match your event's style and mood. No design skills needed – we've got you covered!
Sharing your themed invitation cards is a breeze. Send them via text message, email, social media, or any other preferred communication channel to reach your guests.
How to Create and Share Themed Invitation Cards:
- Open the app and navigate to the event screen.
- Look for the invite others option.
- Choose a theme that suits your event.
- Share the invitation card with your guests via your preferred communication channels.
AI description helper
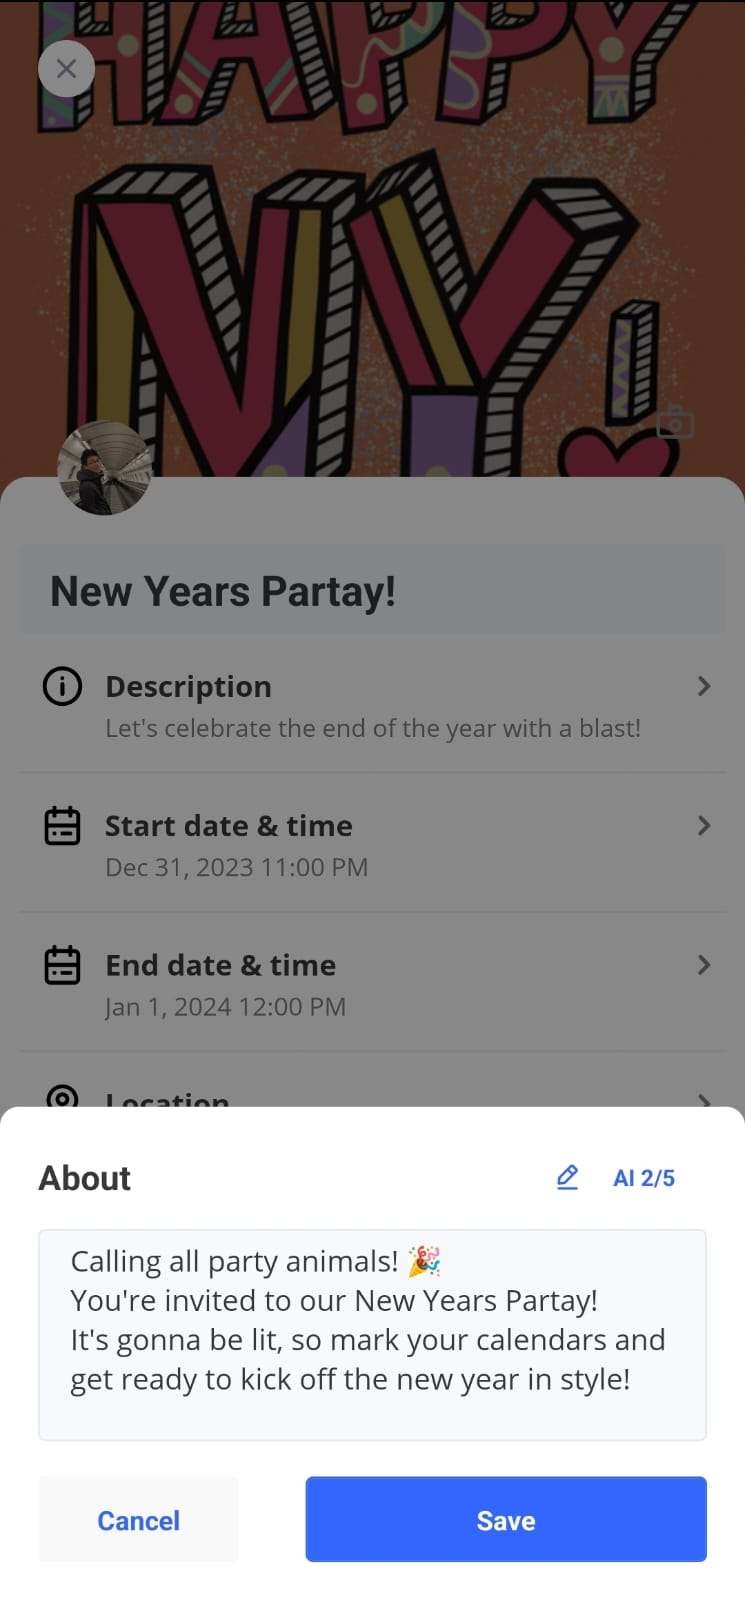
Unleash the power of AI to generate instant event descriptions. Whether you're planning to a concert, organize a birthday party, or a casual get-together, the AI Description Helper provides you with creative and engaging event descriptions in a snap.
No more staring at a blank screen. Save time and energy by using the AI Description Helper to kickstart your event planning process. Focus on the details that matter, while the AI takes care of the descriptive heavy lifting.
How to Use AI Description Helper:
- Open the app and navigate to the event creation or editing page.
- Open the description. Look for the AI icon.
- Let the AI work its magic and generate a description for your event.
- Tap on it again to cycle through the options
- Modify based on your requirement.
Polls
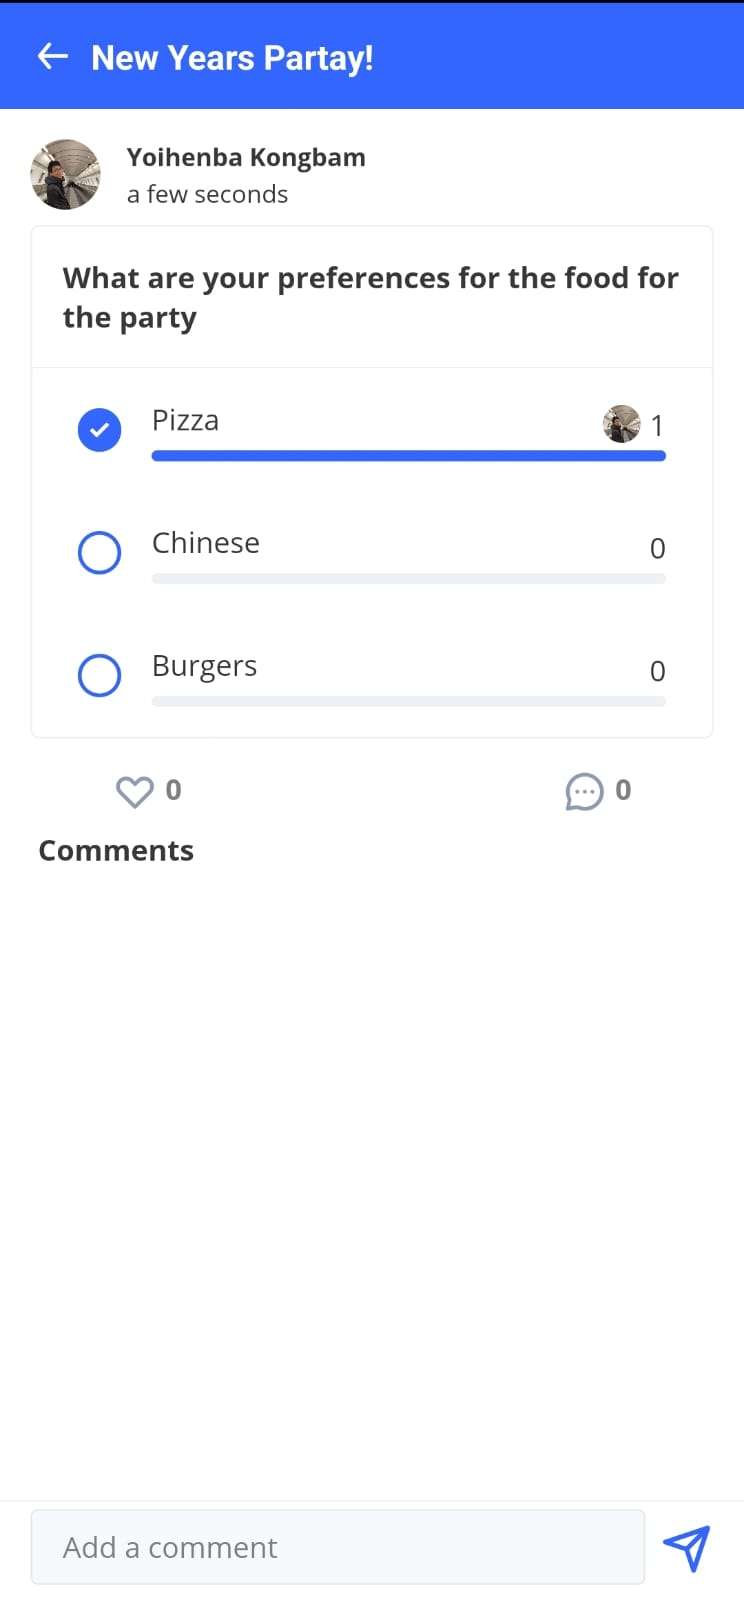
Empower your event community by creating polls to gather opinions, preferences, and feedback. Whether it's about event themes, activities, or food choices, let your audience have a say in shaping the experience.
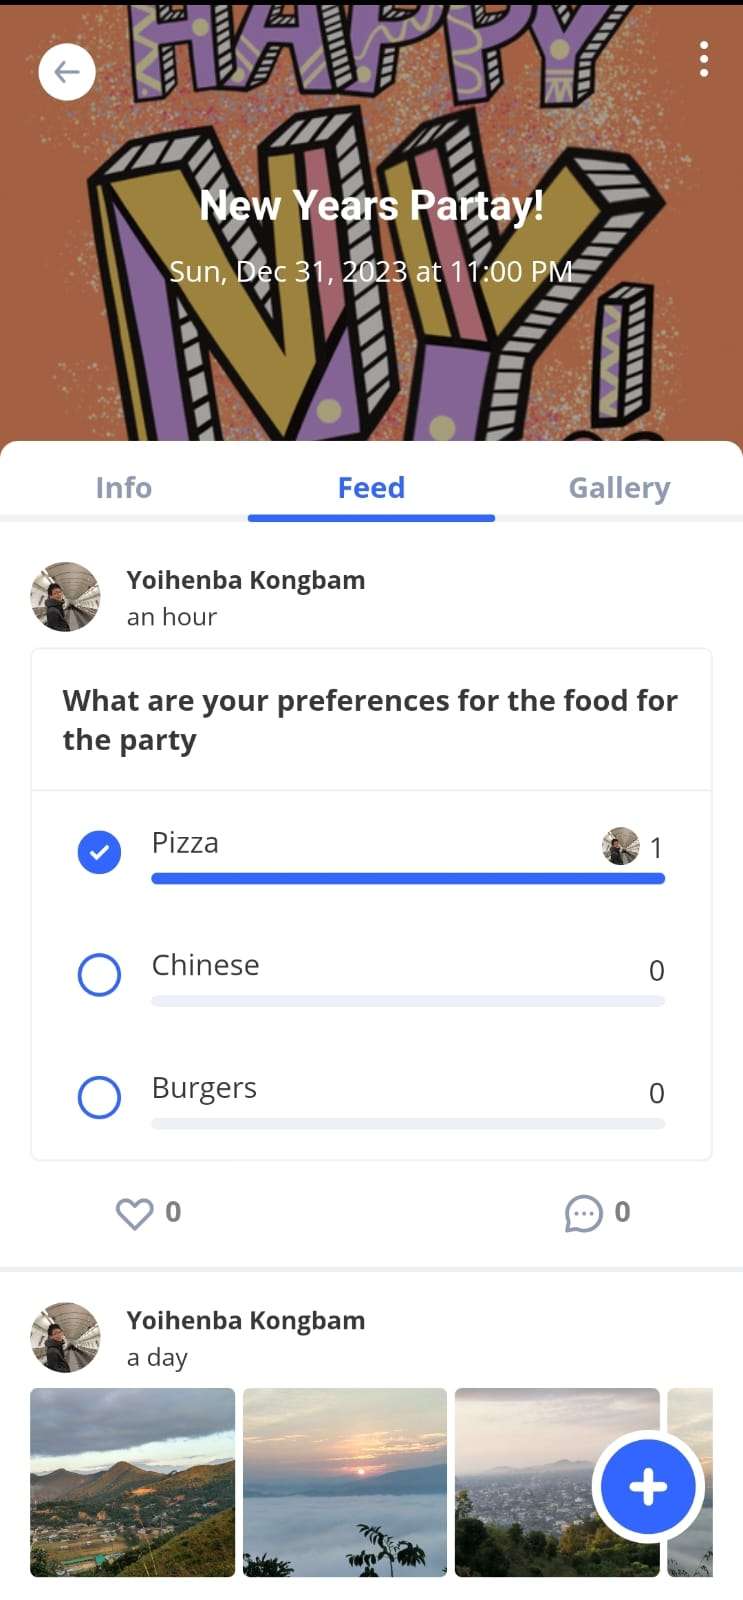
The Polls feature seamlessly integrates with the event/squad feed, allowing participants to spark discussions, gather feedback, and keep the event community engaged.
How to Create and Participate in Polls:
- Open the app and navigate to your event/squad.
- Click on the create post icon on the feed tab on the squad or event page
- Click on the poll icon below the text box.
- Create your poll.
- Post and gather answers!
Download App
Event Creation on the Web
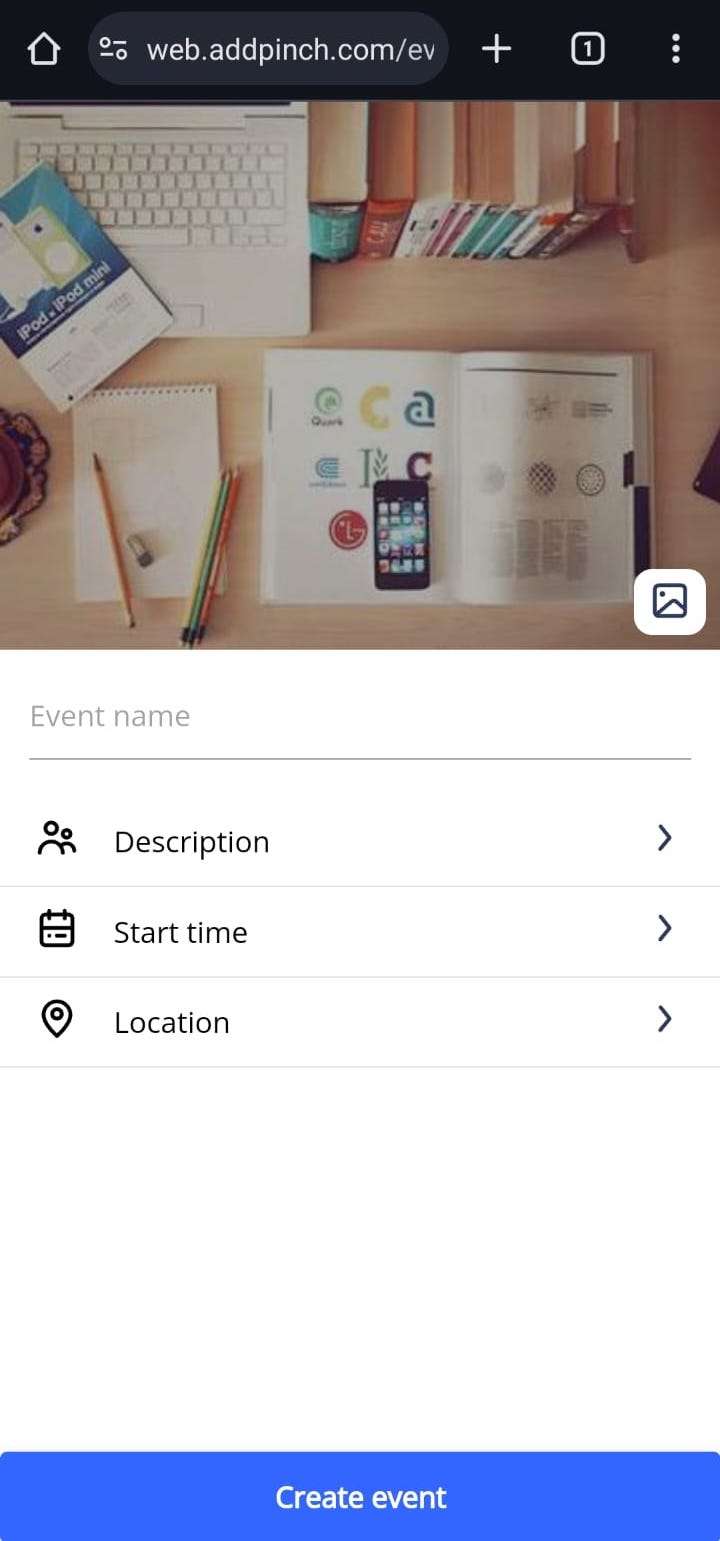
Organize and plan your events seamlessly using our web interface. The same powerful event creation tools you love on the app are now available on the web, providing you with a broader canvas to bring your events to life. Create events from your desktop, laptop, or tablet with ease.
How to Create Events on the Web:
- Open your preferred web browser and navigate to http://web.addpinch.com/event/create
- Fill in the event details. Click on "Create Event".
- Log in to your account and voilà — your event is ready to go!
Gif and Stock image support on Web
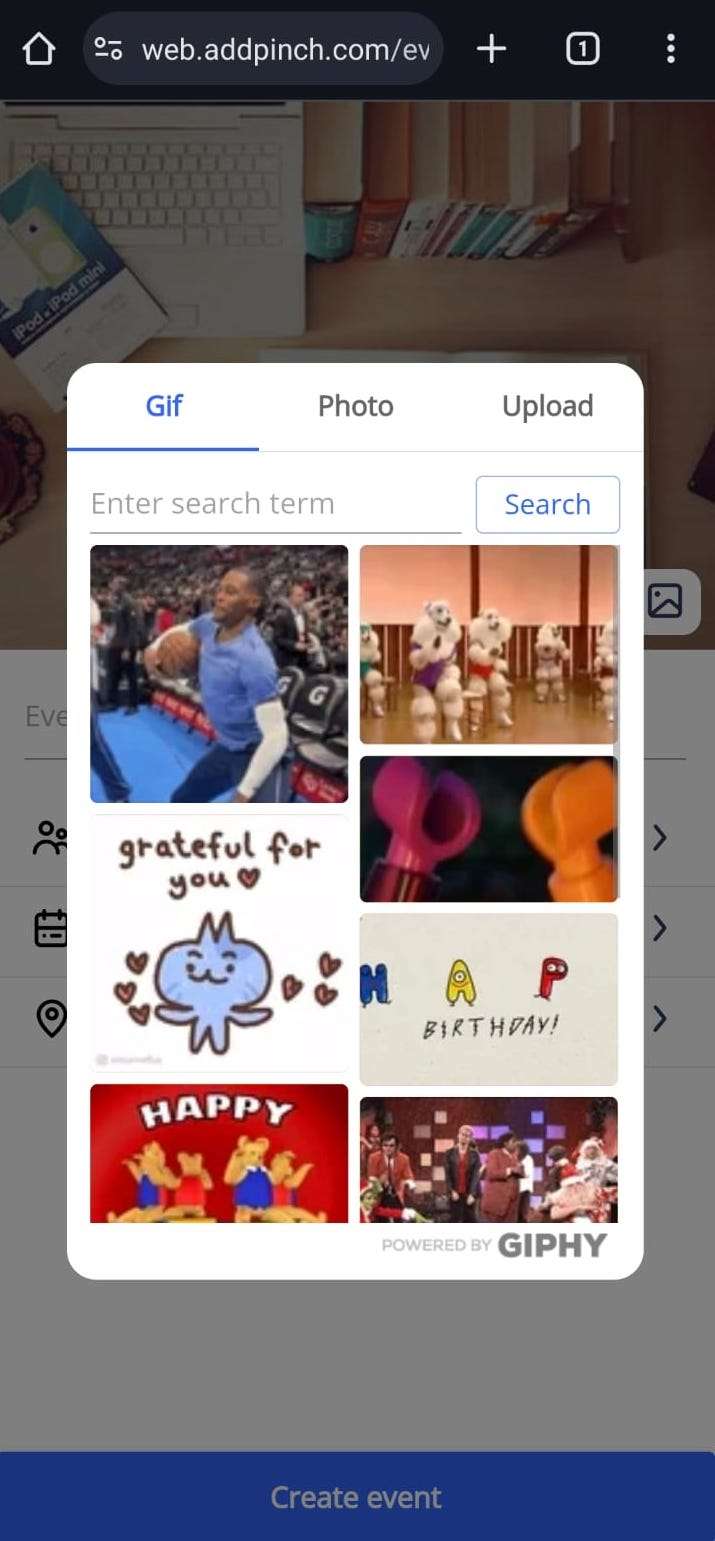
Spice up your event invitations and updates with animated GIFs. Our expanded library lets you search and discover the perfect GIFs to convey your excitement, humor, or any emotion you want to share with your attendees.
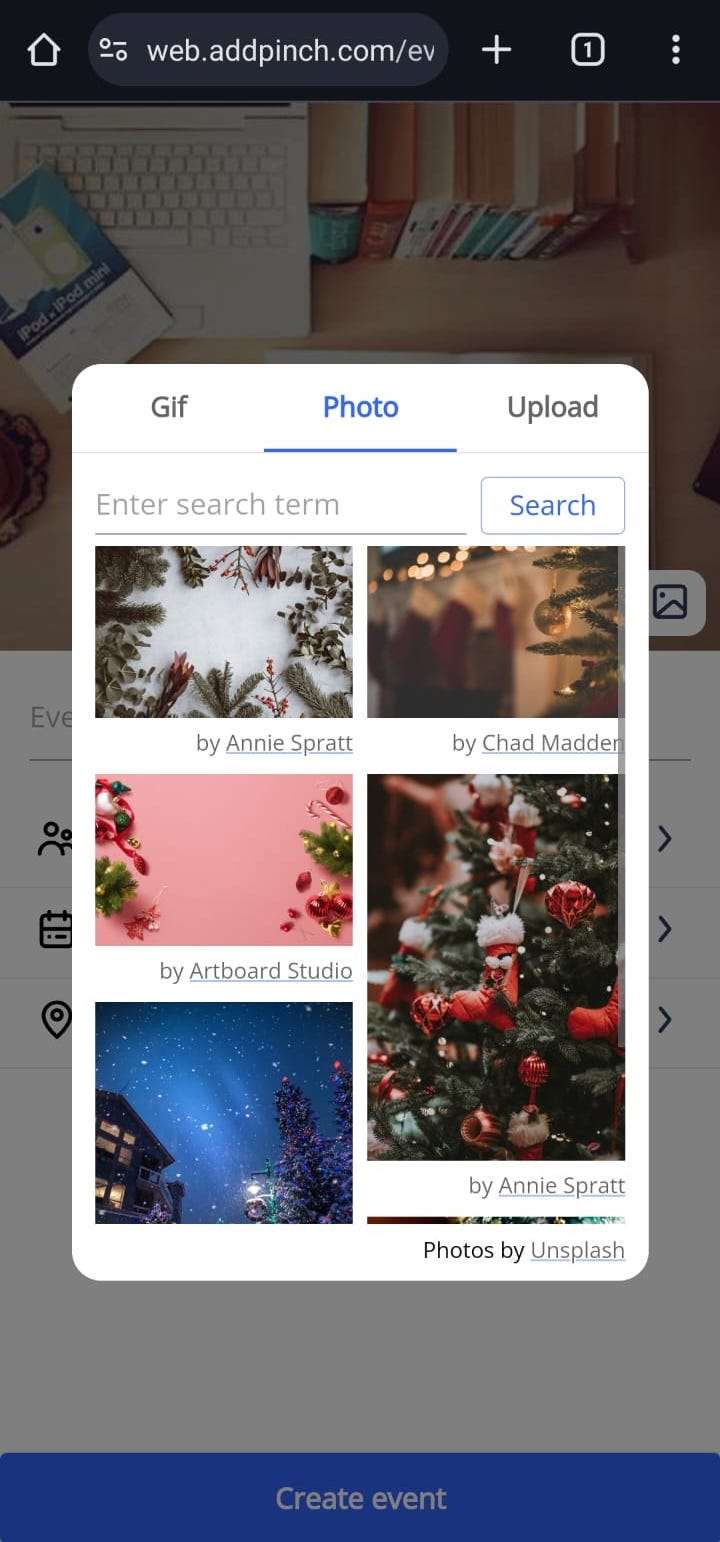
Enjoy the freedom to express your unique style. Browse through an extensive selection of GIFs and images, and with a simple click, add them to your events.
How to Use GIF and Stock Image Search on Web:
- Open your preferred web browser and navigate to the event creation page.
- Look for the Camera icon in the cover image
- Choose "GIF" or "Photo"
- Enter keywords to find the perfect cover image for your event.
- Select your cover image.
Media enhancements
Media Grouping in the Feed on the pinch app
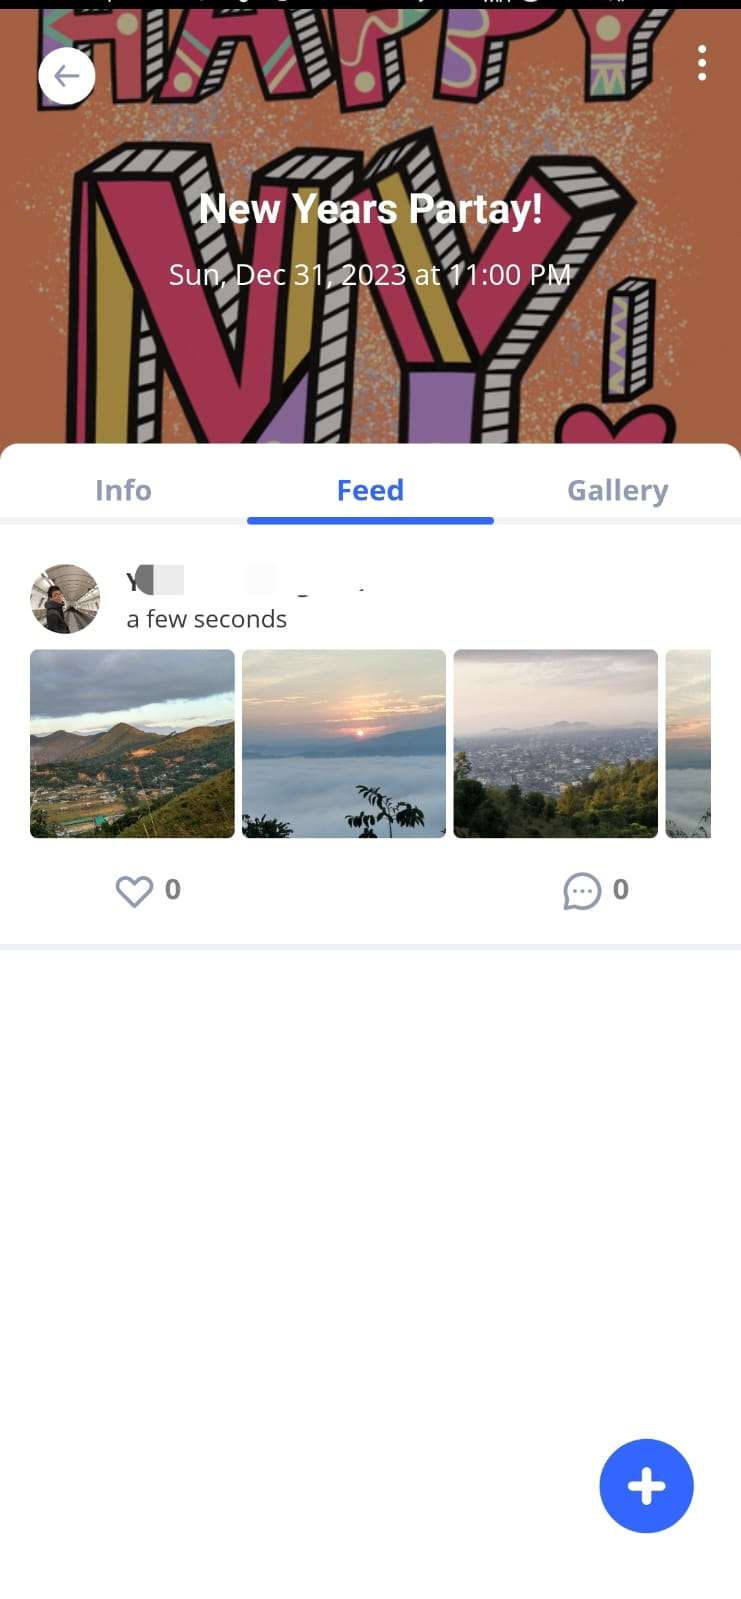
Reduced clutter on the feed when multiple images are uploaded.
Remove cropping in Uploaded media
Now the images are displayed full sized and no longer cropped.
Optimization: Faster image rendering
Optimizations added to compress the images for display. On Download, the image is full quality.
Download App
Mark as Interested
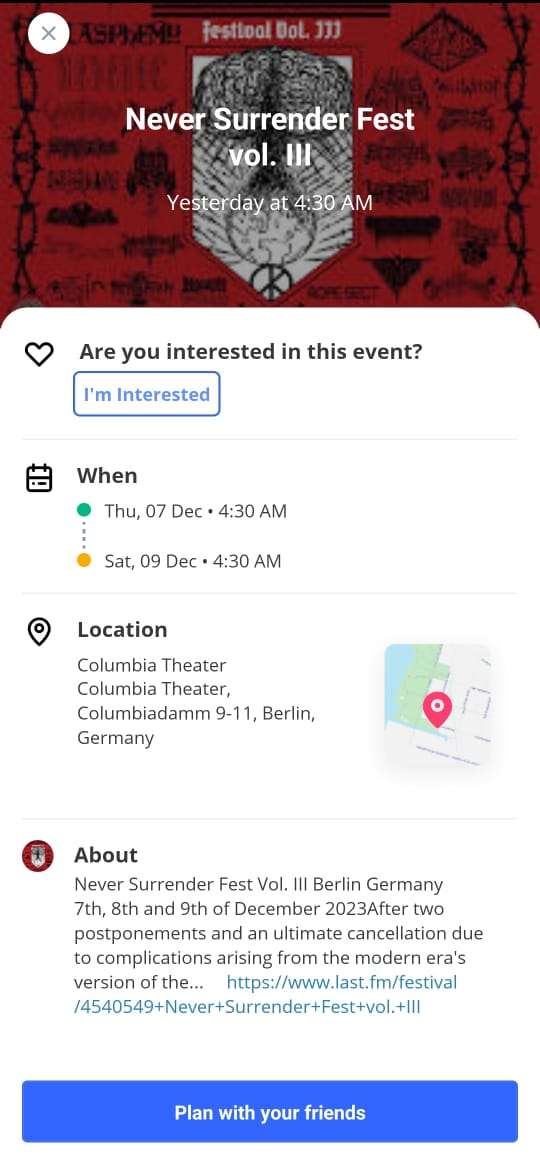
Now you can show your enthusiasm for an event directly from the Explore Events section. With the new "Interested" button. Keep track of events you're interested in by visiting the explore screen, where you'll find a dedicated section showcasing all the events you've marked as "Interested."
How to Mark Explore Events as Interested:
- Open the app and navigate to the "Explore Events" section.
- Browse through the events and find one that catches your eye.
- Tap the "Interested" button to express your intent to attend.
- Visit your profile to view all the events you've marked as "Interested."
Web: Add event to calendar
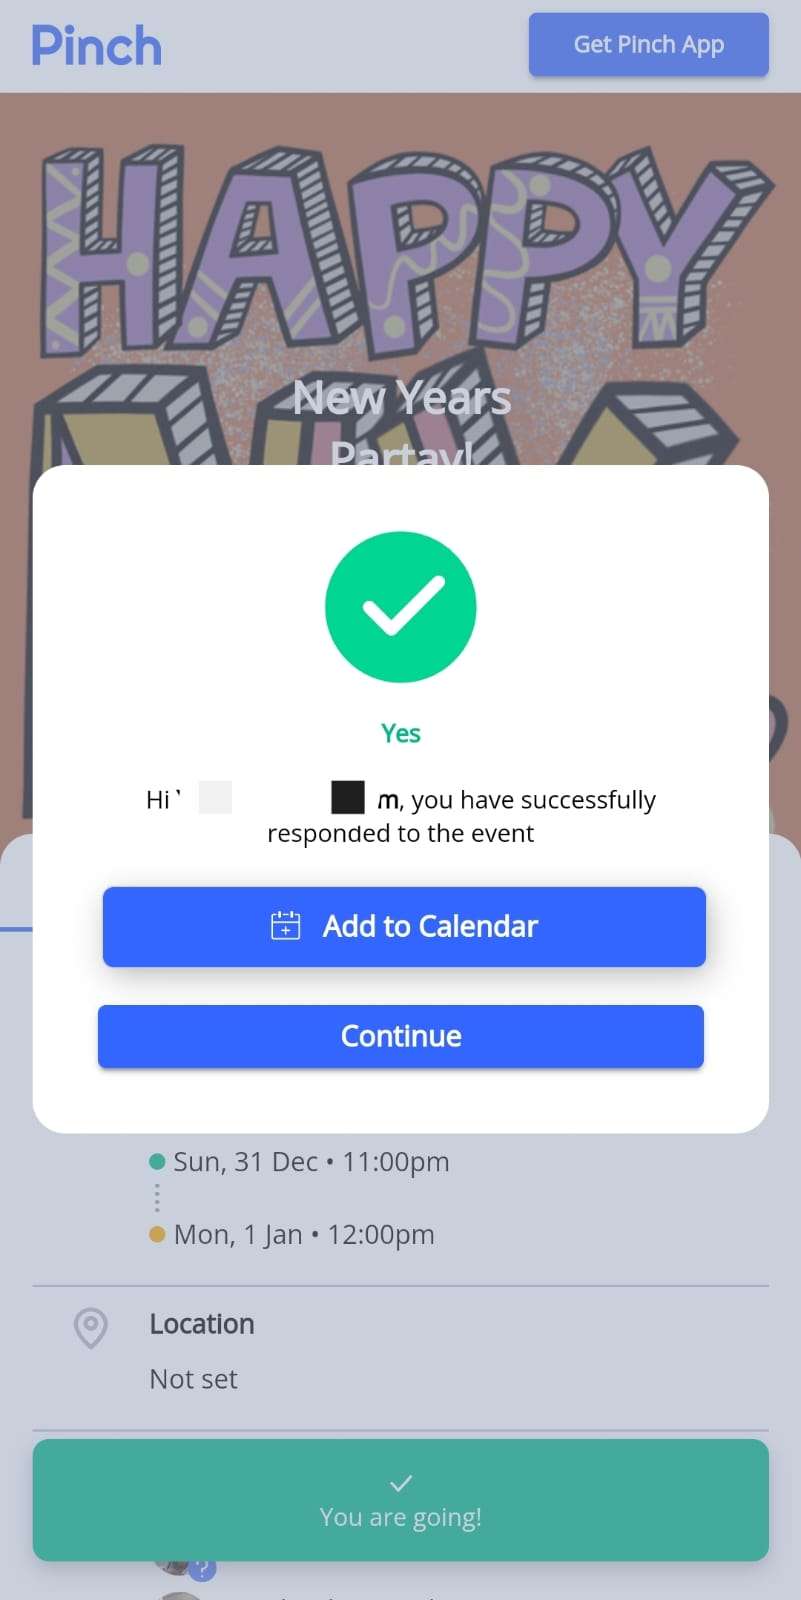
With the new "Add to Calendar" feature in our web view, you can effortlessly sync event details directly to your preferred calendar application. Even if you don't have the app, keep track of your commitments and stay organized without missing a beat.
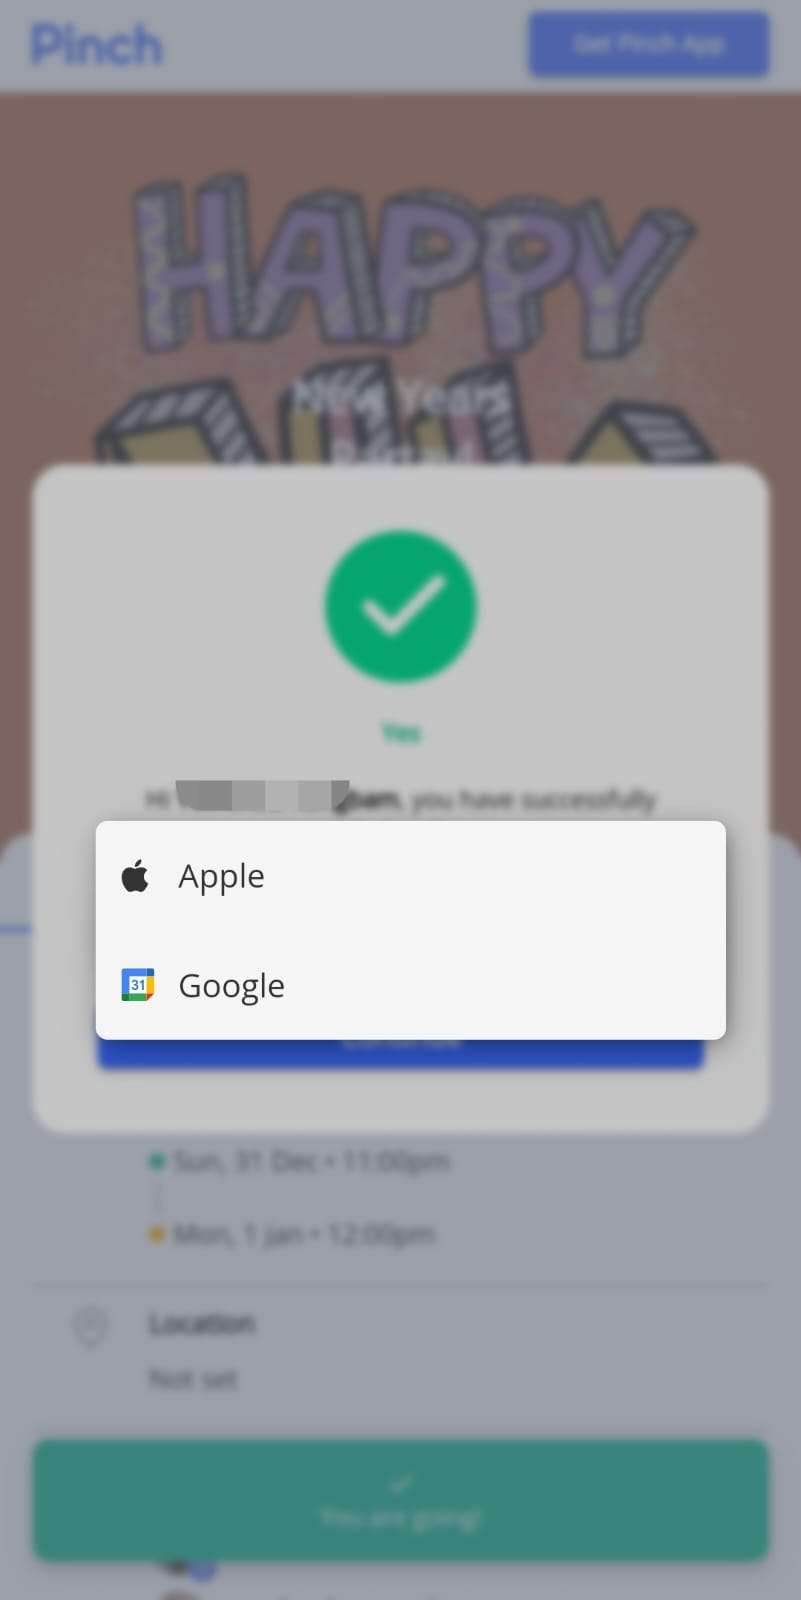
How to Add Events to Your Calendar in Web View:
- Open the event in the web view and accept an invitation.
- Look for the "Add to Calendar" button.
- Click the button to seamlessly add the event details to your preferred calendar application.
Uploaded media now appear on the feed
Attendees can now engage with your media directly from the feed. Like and comment your favorite moments.
Download App
Load More
→